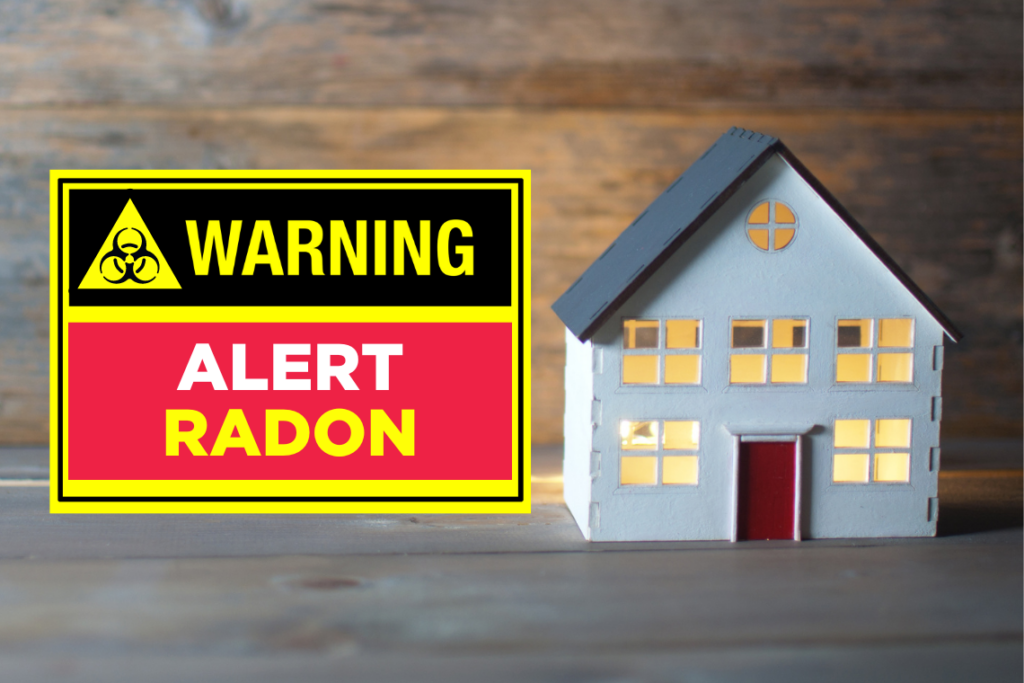
Radon Testing Essentials: What Every Homeowner Should Know

When it builds up in dwellings, radon, a colorless, odorless, and tasteless radioactive gas, can pose serious health hazards. It may enter homes through cracks, openings, and other entrance sites since it is a result of the natural breakdown of uranium in rock and soil. Each year, radon causes thousands of fatalities and is the second-leading cause of lung cancer after smoking. Homeowners must be aware of the possible risks posed by radon and take proactive measures to safeguard their families.
Radon in Homes: Common Entry Points and Accumulation

Radon can enter homes through various pathways, including cracks in the foundation, gaps around pipes, and even through well water. Once inside, Niton can accumulate to dangerous levels, especially in poorly ventilated spaces like basements and crawl spaces. Understanding the common entry points and how niton accumulates is essential for homeowners to assess their risk. When conducting a radon testing home inspection, professionals pay close attention to these entry points to provide a comprehensive assessment of levels in your home.
Why Radon Testing is Crucial for Homeowners
Given the serious health risks associated with niton exposure, testing for radon is a critical step for homeowners. Radon levels can vary significantly from one home to another, and the only way to know if your house is affected is through examination. Early detection of elevated niton levels can help prevent long-term health problems and the need for costly mitigation measures.
Radon Testing Methods: Passive vs. Active
There are two primary methods for checking niton levels in your residence: passive and active examination. Passive tests are non-electronic and include charcoal canisters and alpha-track detectors. Active trials, on the other hand, use electronic devices to continuously monitor levels. Each method has its advantages and disadvantages, and the choice depends on factors like the desired duration and accuracy.
DIY Radon Testing Kits: How to Use Them

Using DIY Niton examination kits is a straightforward process that allows homeowners to assess niton levels in their homes conveniently. These kits typically come with detailed instructions, making them user-friendly. To use them effectively, follow these general steps:
- Choose the Right Location: Place the testing device in the lowest livable area of your home, like a basement or ground floor.
- Keep Closed: Ensure all doors and windows remain closed throughout the testing period, usually between 2 to 7 days, depending on the kit.
- Avoid Disturbances: Minimize movements near the test device to prevent interference.
- Send for Analysis: Once the testing period ends, seal the kit and send it to a lab for analysis, following the kit’s specific instructions.
- Wait for Results: Await the results to determine if further action is needed to mitigate Niton levels in your home.
Hiring Professionals for Accurate Radon Testing
While DIY kits are useful, homeowners seeking the most accurate measurements should consider hiring a qualified niton professional. These experts have the knowledge and specialized equipment to conduct comprehensive testing. Professional testing is especially crucial if you’re planning to buy or sell a house, as it provides an objective assessment.
Interpreting Radon Test Results: What to Look For
Interpreting niton test results is vital for homeowners to assess potential risks accurately. Radon levels are typically measured in picocuries per liter (pCi/L). The EPA recommends taking action if your test results show levels exceeding 4 pCi/L. However, it’s crucial to remember that lower levels can still pose health risks, so any detected niton should be taken seriously.
Understanding the results and their implications is essential for determining the appropriate next steps. Whether your levels are slightly elevated or significantly high, consulting with a professional to discuss mitigation options is a prudent course of action to ensure the safety and well-being of your household.
Radon Mitigation Options for Elevated Levels
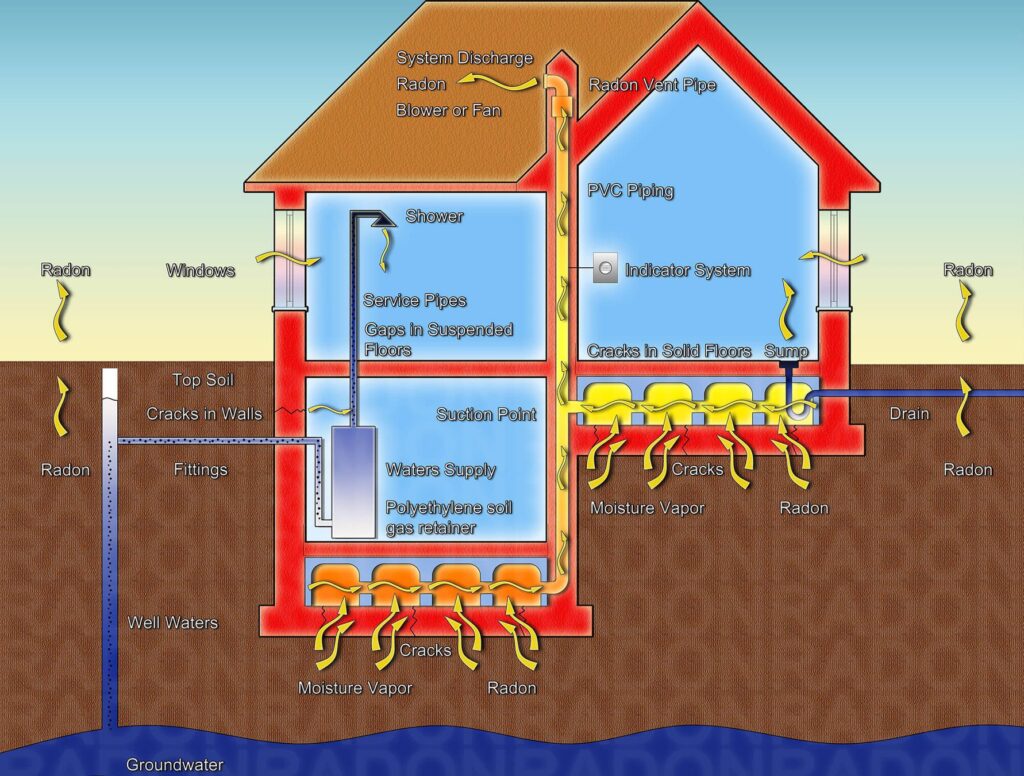
When niton test results reveal elevated levels in your residence, taking immediate action is essential. Radon mitigation offers several options to reduce the concentration of this harmful gas. Common methods include sub-slab depressurization, crawl space ventilation, and sealing entry points.
Sub-slab depressurization involves installing a system that draws Niton from beneath the foundation and safely vents it outside. Crawl space ventilation utilizes fans and vents to dilute radon in the crawl space. Sealing entry points, such as cracks and gaps, prevents radon from entering your house in the first place.
Choosing the appropriate mitigation method depends on your home’s specific characteristics and the guidance of a qualified mitigation professional.
Cost Considerations for Radon Testing and Mitigation
When it comes to Niton testing and mitigation, cost considerations are a crucial factor for homeowners. The expenses associated with Niton-related measures can vary depending on several factors, including the size and layout of your house, the chosen method, and the mitigation solution required.
DIY testing kits are generally affordable and accessible, making them an attractive option for budget-conscious homeowners. However, professional niton testing may be necessary for more accurate results, albeit at a higher cost.
Mitigation costs can also fluctuate significantly, depending on the complexity of the system needed. It’s essential to view these expenses as an investment in your family’s health and safety. While it may require financial planning, addressing concerns promptly is a wise and responsible choice to ensure a nation-safe house.
Radon-Resistant Construction: Prevention Measures
New homeowners or those planning to build a house can take proactive measures to reduce radon entry. Radon-resistant construction techniques include installing a gas-permeable layer under the foundation, sealing cracks and gaps, and implementing venting systems. These preventative measures can significantly reduce the risk of niton infiltration.
Maintaining a Radon-Safe Home: Ongoing Awareness
Testing and Mitigation are not one-time tasks. To ensure your residence remains nation-safe, periodic testing is necessary, especially after any structural changes or renovations. Additionally, maintaining proper ventilation and monitoring indoor air quality contributes to long-term safety.
Conclusion
In conclusion, radon is a silent threat that every homeowner should be aware of. It’s essential to understand its sources, the risks it poses, and how to test for and mitigate it effectively. Whether you choose DIY testing or hire a professional, taking action to protect your family’s health is a responsibility that should not be overlooked. By staying informed and proactive, you can create a nation-safe home environment that promotes peace of mind and well-being.